15. User Management
The Connectivity Suite user hierarchy consists of three different user roles.
15.1. Platform Admin
The Platform Admin is the highest in the role hierarchy. A Platform Admin can administer the complete Connectivity Suite instance. This means he can administer VPN Networks, Devices and users.
15.2. Network Admin
A Network Admin can only administer Devices connected to a specific VPN Network. A Network Admin can assign the Network Admin and Network user roles for VPN he administrates to other users.
15.3. Network user
The Network user only can access and monitor Devices within specific VPN Network. However, a Network user is not allowed to manipulate Devices via the Connectivity Suite.
15.4. User rights table
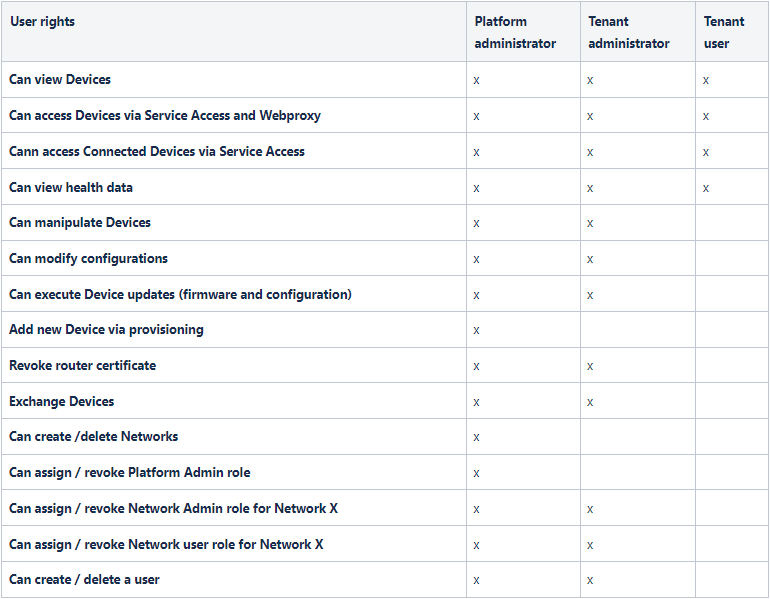
Fig. 15.1 User rights table
15.5. Assigning user rights
Navigate to the page “User Management” of the Connectivity Suite UI by clicking on the tool icon in the Support bar.
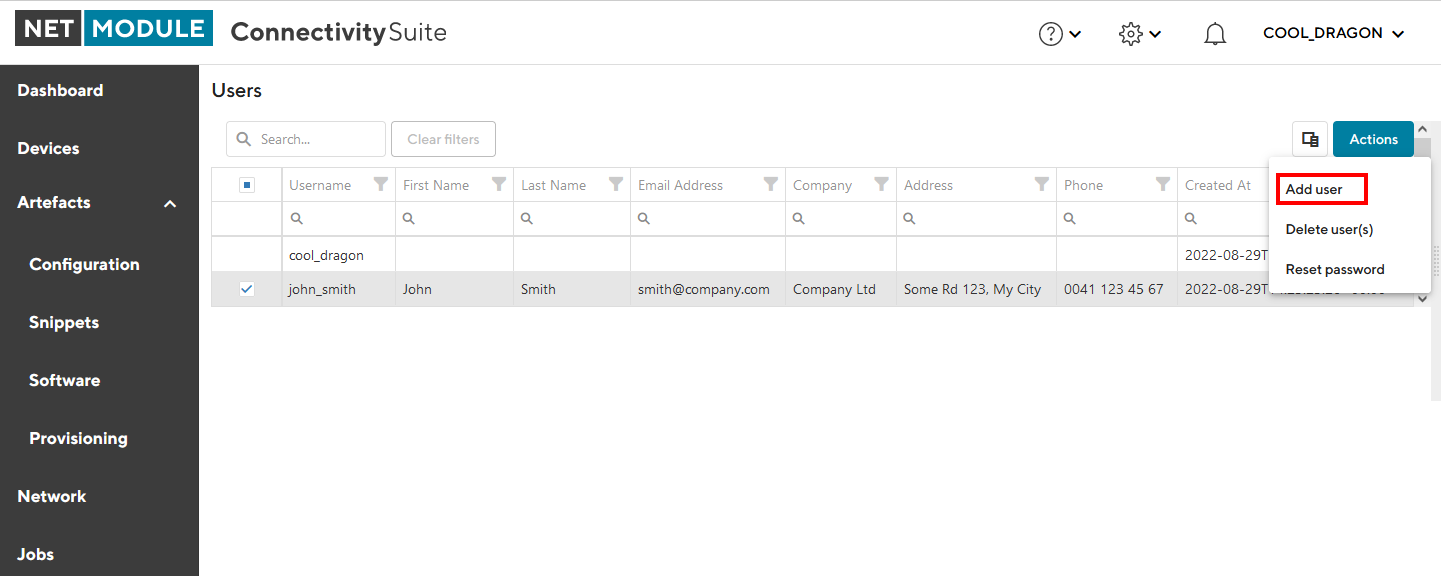
Fig. 15.2 Manage users
Click on “Actions” at the upper right corner of the Main dialogue box and click “Add user” to add a user.
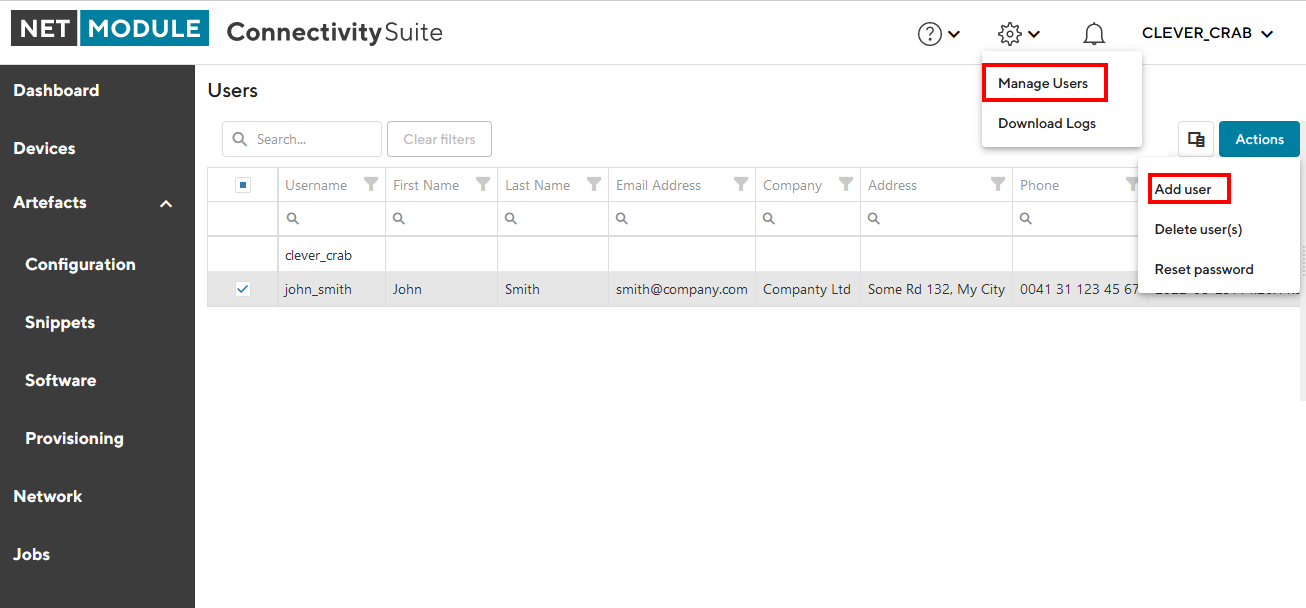
Fig. 15.3 Added user
Fill out the required user details fields and click on “Next”
Select the desired user roles and click “Add User” to add the user.
The added user must now be shown in the Main dialogue box in the table.
When creating the user following parameters can be set
Username |
Name of the user (Login credential) |
Email of the user |
|
Password |
Password to login (Login credential) |
First Name |
First name of the user |
Last Name |
Last name of the user |
Address |
Address of the user |
Company |
Company the user works for |
Phone |
Company phone number |
When the tab “User Roles” is opened in the Main dialogue box, the user rights can be assigned there.
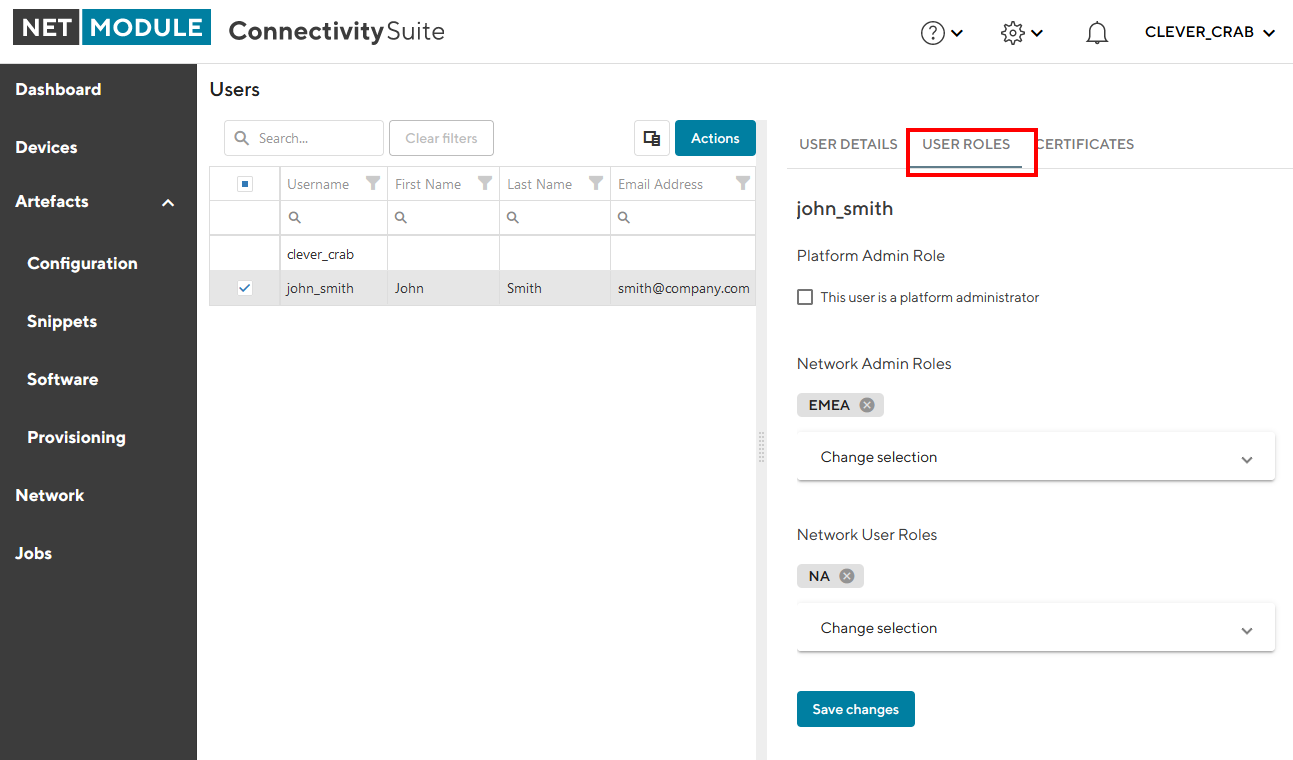
Fig. 15.4 User roles
The following settings can be made:
Platform Admin |
If the checkbox is set the new user will have platform admin rights |
Network Admin |
Select the VPN Network of which the user will have admin rights (if no selection is taken the user won’t be a Network admin). See Fig. 15.1 for the different user rights. |
Network User |
Select the VPN Network the user can access. See Fig. 15.1 for the different user rights. |
15.6. Password Policy
Note
Starting with Connectivity Suite version 3.7.4 a password policy is enforced when adding a user, changing a password, or resetting a password. The policy is as follows:
Every password has to be at least 15 characters long
Every password needs to contain at least 1 upper-case letter
Every password needs to contain at least 1 lower-case letter
Every password needs to contain at least 2 digits
A password is not allowed to be identical to the username
A password is not allowed to be identical to the user’s email address
A password is not allowed to be the same as the current one
15.7. Brute Force Protection
Note
Starting with Connectivity Suite version 3.7.4 brute force protection is enabled to strengthen security. This has the following consequences:
An account gets locked after 5 consecutive failed login attempts within 5 minutes
An account automatically gets unlocked after 30 minutes
No account gets locked permanently
15.8. Enabling Two-Factor Authentication (2FA)
Note
2FA is configured in Keycloak, the identity provider for the Connectivity Suite.
It can either be enforced for all users or for individual users only.
Keycloak currently supports these authenticator applications:
Microsoft Authenticator
Google Authenticator
FreeOTP
15.8.1. Enforcing 2FA for all users
Get the Keycloak Admin credentials
On the CS server, run this command and make a note of the username and password:
grep KEYCLOAK cs/app/compose.yml
Log in to Keycloak
In a browser, go to
https://<cs_domain>/auth/.Log in using above credentials.
Select Realm
At the top of the left-hand menu, click on Manage realms.
In the table, click on cs.
You should see a “Welcome to Connectivity Suite” message.
Navigate to Authentication
In the left-hand menu, click on Authentication.
Modify the Browser Flow
Select the Browser flow. This is the flow used when users log in via a web browser.
Look for the Browser - Conditional 2FA option, which is typically set to Conditional by default. Change this to Required. Please note that for installations done with TOM version 3.7.3 or older, the option is called Browser - Conditional OTP.
Look for the OTP Form option, which is typically set to Alternative by default. Change this to Required.
Optional: Configure OTP Policy
In the left-hand menu, click on Authentication.
Select the tab Policies, and there the tab OTP Policy.
Note that the supported authenticator applications may change depending on the OTP policy.
Set up Mobile Authenticator
The next time a user logs in, he has to set up a Mobile Authenticator:
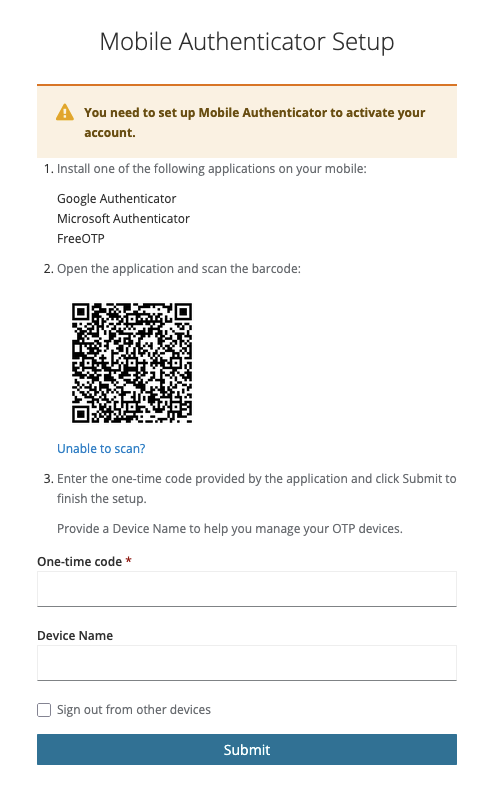
Fig. 15.5 Mobile Authenticator Setup
15.8.2. Enforcing 2FA for individual users
Follow the instructions above, but make sure that the Browser - Conditional 2FA option is set to Conditional.
In the left-hand menu, click on Users. Select the desired Username.
In the field Required user actions, select Configure OTP, and click Save. If this action is not visible, type ‘c’ to make it appear.
The next time this user logs in, he has to set up a Mobile Authenticator.
15.8.2.1. Disabling 2FA for a user
Note
This is not possible if the Browser - Conditional OTP option is set to Required. This means that you cannot enforce 2FA for all users and then disable it for individual users.
In the left-hand menu, click on Users. Select the desired Username.
Select the tab Credentials.
Remove the line Otp by selecting Delete from the corresponding three-dot menu on the right-hand side.
This user can now log in without 2FA.