3. First steps
3.1. License
Starting from software version v3.5 and newer, a valid License Key is required for every Connectivity Suite instance to operate.
License Keys are to be obtained through orders.emea@belden.com
3.1.1. License Management
Click on the “+” button, select a previously received license key file (.lic) and hit import.
The status page (see Fig. 3.1) provides a comprehensive overview of the current licensing status.
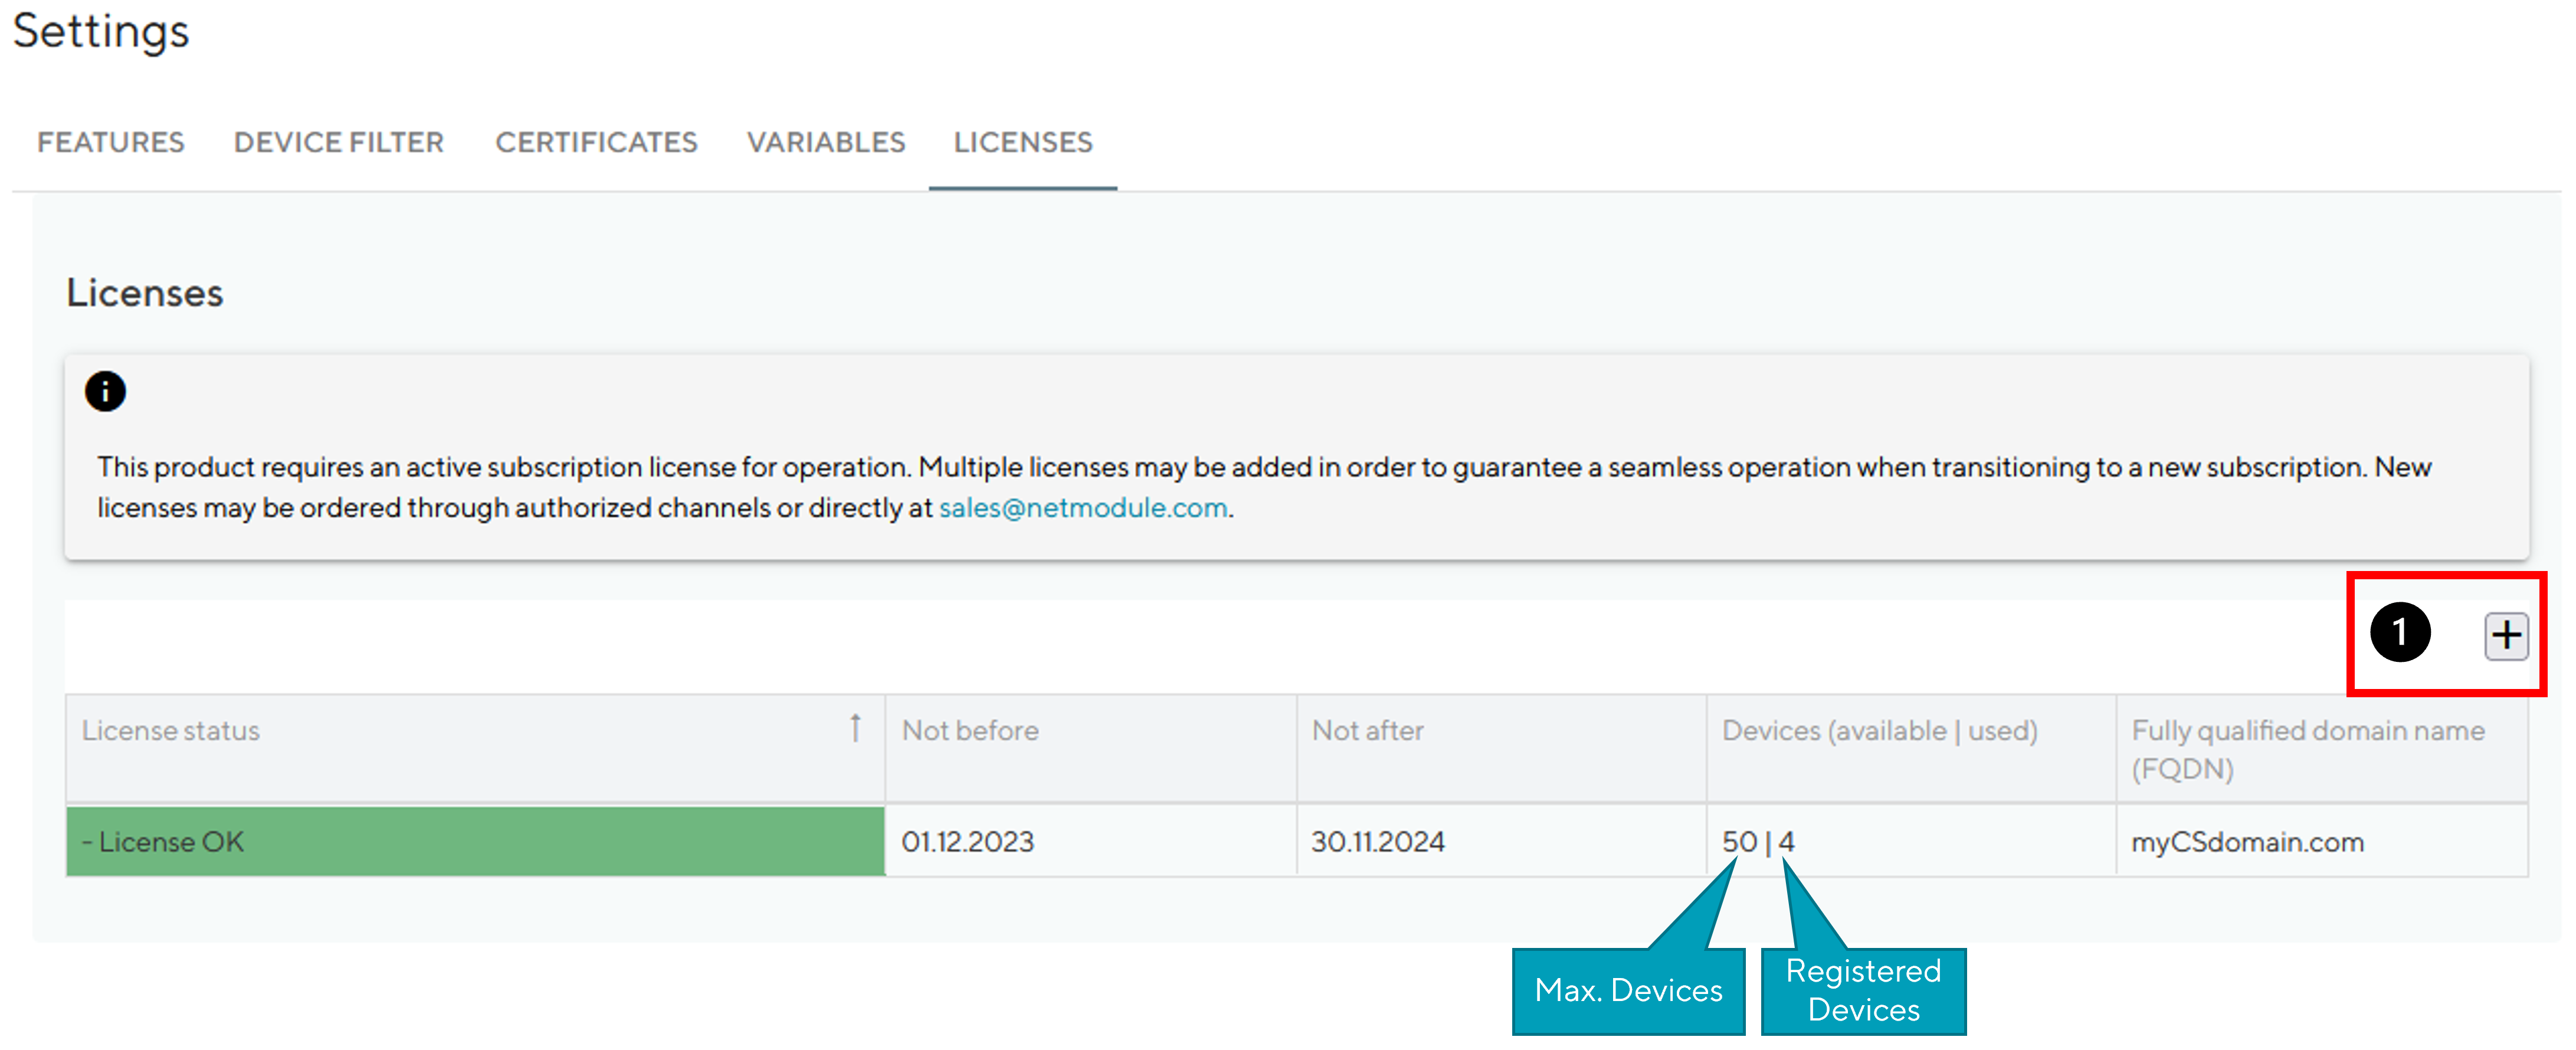
Fig. 3.1 License Overview Table
License Status |
Explanation |
Action |
OK |
License is valid and covers number of registered devices |
Nothing required |
Exceeded |
Too many devices registered |
Order new license for more devices |
Expired |
License has expired and is no longer valid. Not after date is in the past. |
Renew license |
Missing |
No license found |
Import license, by clicking “+” button |
A notification email will be sent ahead of time for licenses that are about to expire, allowing sufficient time for renewal.
3.2. First Login
After login users will be directed to the dashboard. This one will initially look pretty empty but start to fill up as soon as networks are created and devices are added to the platform.
The Provisioning Network and the Backend Network are already deployed during the installation. Therefore, the two networks must already be displayed in the dashboard at the beginning.
As a next step it is necessary to set up a VPN Network to which a Device can be assigned, as only devices in a VPN Network can be managed via the Connectivity Suite. The procedure how to add VPN Networks is described in Add a Network.
3.3. Adding a Network
See Section 4.1 on how to add a new Network
3.4. Adding a Provisioning Configuration
See Section 9.6 on how to add a new Provisioning Device Configuration
3.5. Installating a Provisioning Configuration
See Section 6.2.5 on how to add install a Provisioning Device Configuration on a Device
3.6. Move Device from Provisioning to Network
See Section 6.4.5 on how to move a Device from the Provisioning to the newly created Network