9. Artifacts
9.1. Snippets
9.1.1. Add Snippets
A snippet is an excerpt from the configuration parameters that configures a specific function of the router, e.g. activating the USB port or switching off WLAN. Snippets can be used to configure an infinite number of Devices, regardless of the Device type (only applies to NM devices). They are not comlete Device Configurations (in comparison to Template Device Configurations as described under Template Device Configurations)
Note
Switches currently do not support Snippets.
All configuration parameters which can be used for a Snippet are documented and can be found in the NM Wiki using following link: https://wiki.netmodule.com/documentation/config-parameters?s[]=parameter
Example of a complete Snippet that originates from a configuration with version 1.8 and enables the USB port 0:
config.version=1.8
usb.status=1
usb.0.enabled=1
Before the configuration can be deployed for a massconfiguration a Snippet must be created:
Navigate to the page “Snippets” and click on “Actions” and “Add Snippet” to add a snippet.
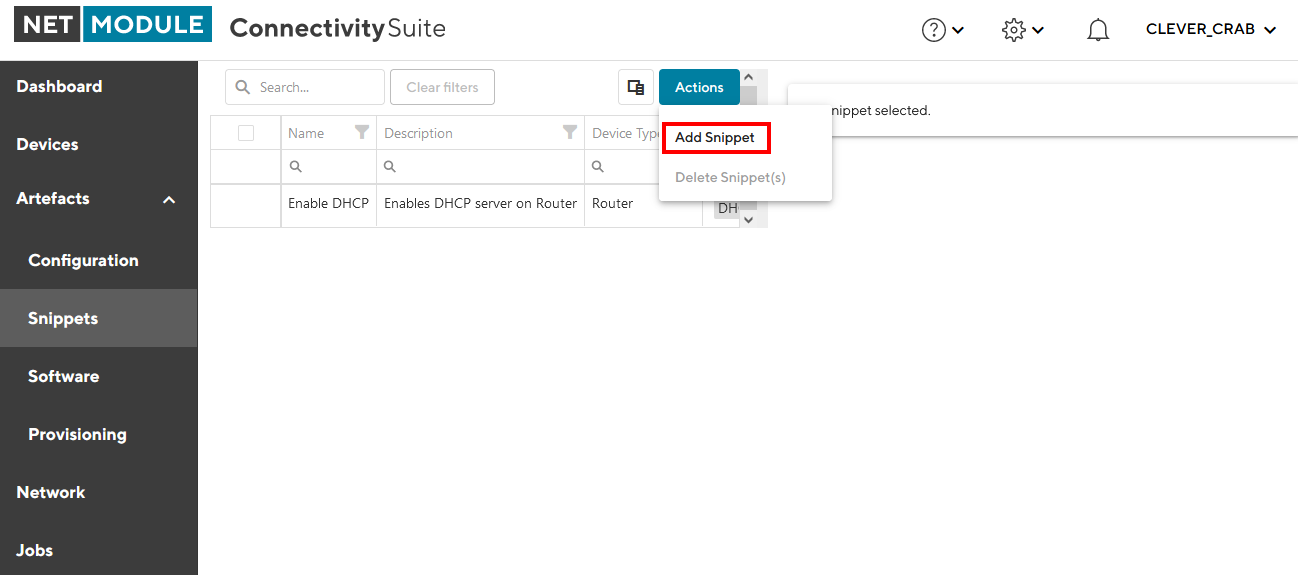
Fig. 9.1 Add Snippet Action
Fill out the required fields and click “Add Snippet” to save the Snippet.
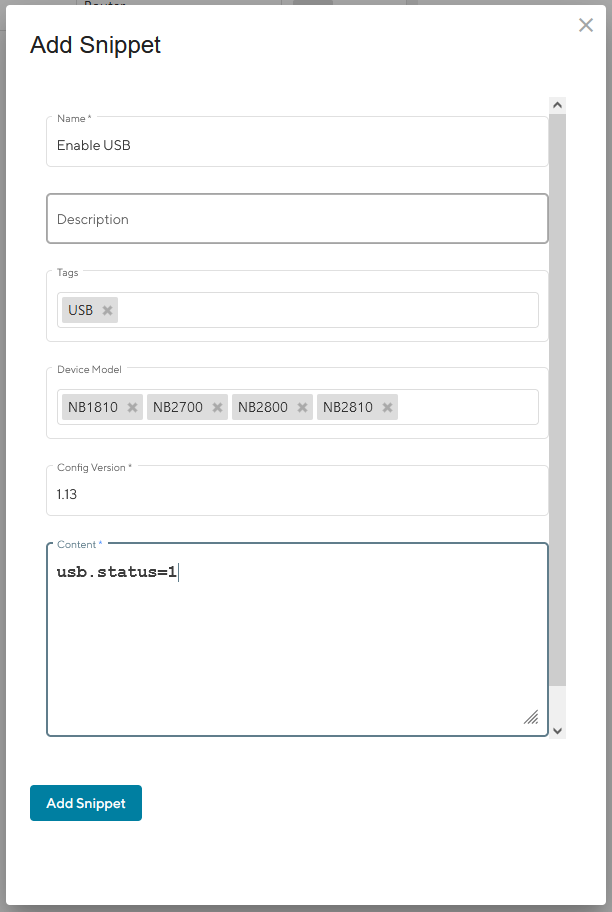
Fig. 9.2 Add Snippet Dialog
When creating the Snippet following parameters can be set:
Name |
Name of the Snippet |
Description |
Description of the Snippet to be executed |
Tag |
Tag to identify the Snippet |
Device Typ |
Device type can be a NM switch or router |
Content |
Subset of configuration parameters taken from a user-config.cfg file can be filled in this field |
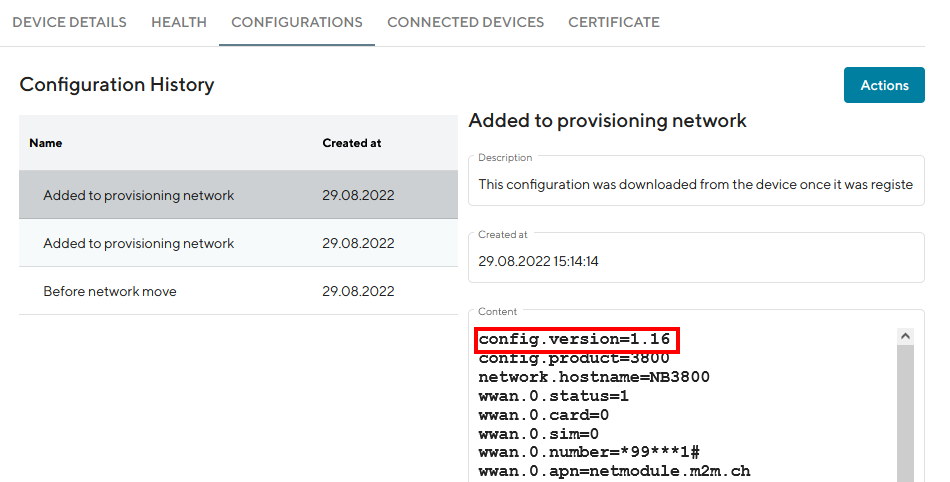
Fig. 9.3 Configuration version
A confirmation message will pop up. The added Snippet will be listed in the Main dialogue box in the table.
9.1.2. Deploying Snippets
See Section 6.4.2 on how to deploy Snippets
9.2. Template Device Configurations
Template Device Configurations are complete Device Configurations (in comparison to Snippets as described under Section 9.1 ) which get patched before a deployment to each Devices needs (certificate, keys etc).
9.2.1. Add Template Device Configuration
Navigate to the page “Configuration” and click on “Actions” and “Add Template Device Configuration” to add a configuration.
Fill out the required fields, upload the switch configuration file and click “Add” to save the configuration.
The added configuration will be listed in the Main dialogue box in the table.
Navigate to the page “Devices” and select the switches in the main dialogue Box that are to be configured. Click on “Actions” at the upper right corner of the Main dialogue box and click “Deploy Configuration”.
Select the configuration to be deployed and whether you want to deploy the configuration immediately or if it should be scheduled.
Confirm the deployment by click “Start deployment”.
When a configuration deployment has started it will be listed as a Job in the Jobs table (see Section 10). Jobs can be scheduled while creating them (see step 7). Therefore following scheduling options are possible:
Start Date |
The first day on which the Connectivity Suite is going to try to execute the Job, if all conditions are met (time window, day of the week etc.). |
End Date |
The last day on which the Connectivity Suite is going to try to execute the Job, if all conditions are met (time window, day of the week etc.). |
Days |
Offers the possibility to constrain the execution of the Job to specific days of the week. By default, the execution is allowed for all days of the week (the blue color indicates a selected day) |
Start Time |
Offers the possibility to constrain the Job execution to a certain time frame within a day. Only the hour can be specified, higher precision is not supported currently. Allowed values are 0-23, the default value is 0 (midnight). |
End Time |
Offers the possibility to constrain the Job execution to a certain time frame within a day. Only the hour can be specified, higher precision is not supported currently. Allowed values are 1-24, the default value is 24 (midnight). |
9.2.2. Deploying Template Device Configurations
See Section 6.4.1 on how to deploy Template Device Configurations
9.3. License File Management
NetModule licenses may enable extra functions on the router. Some licenses are tied to specific hardware components the router must be equipped with. A breakdown of licensed features can be found here: https://wiki.netmodule.com/faq/licenses With the corresponding Artefact, such software license files can be deployed to the routers at scale. Doing so, the following steps are to be executed.
Add License Files
Navigate to “Licenses” under the “Artefacts” section.
Upload one or more license files under Actions “Add License(s)”
Single licenses in either .lic or .zip format
Multiple licenses in .zip format
9.3.1. Deploy Licenses
There are two ways of how licenses may be deployed. Either starting from the Licenses Artefacts or from device list, where several filtering options are available.
Artefacts
Navigate to “Licenses”
Select the desired license files to be deployed.
Under Actions, select “Deploy License(s)”.
Choose “Now” or “Scheduled”, depending on when the execution should happen.
Review and Start or Schedule deployment.
Devices
Filter & select the desired devices for which a license is to be deployed.
Under Actions, select “Deploy License(s)”.
Choose “Now” or “Scheduled”, depending on when the execution should happen
Review and Start or Schedule deployment.
Note
Only licenses of devices that have been provisioned to the Connectivity Suite can be deployed.
9.4. Scripts
NetModule Routers come with a built in Software Development Kit (SDK), which offers a simple and fast way to implement customer-specific functions and applications using arena scripts. These scripts can be managed and deployed via Connectivity Suite.
Note
More information about SDK and Scripting can be found here: https://wiki.netmodule.com/sdk/sdk
9.4.1. Add a new Script
Scripts are added to the Connectivity Suite in the same manner as for Configurations, which requires the following steps to be done:
Navigate to “Scripts” under the “Artefacts” section.
Under “Actions”, select “Add Script”.
Complete the corresponding fields.
Select “New” and click “Add” for an empty script to be created.
9.4.2. Import existing Scripts
Already existing scripts may be imported in the following way:
Navigate to “Scripts” under the “Artefacts” section.
Under “Actions”, select “Add Script”.
Complete the corresponding fields.
Select “Import” and browse the file to be imported.
Click “Add” for the script to be imported
9.4.3. Editing Scripts
The detail page of every script consists of three tabs.
Details |
Overview of script, which details may be modified |
Editor |
A new script can be composed, or existing and imported scripts may be edited. The editor supports Section 8.1 as well as the preview function. |
Triggers |
When the script is triggered / started – See details on triggers below |
Configuration & management of Triggers
Add new triggers
Save entry
Discard changes
Delete existing triggers
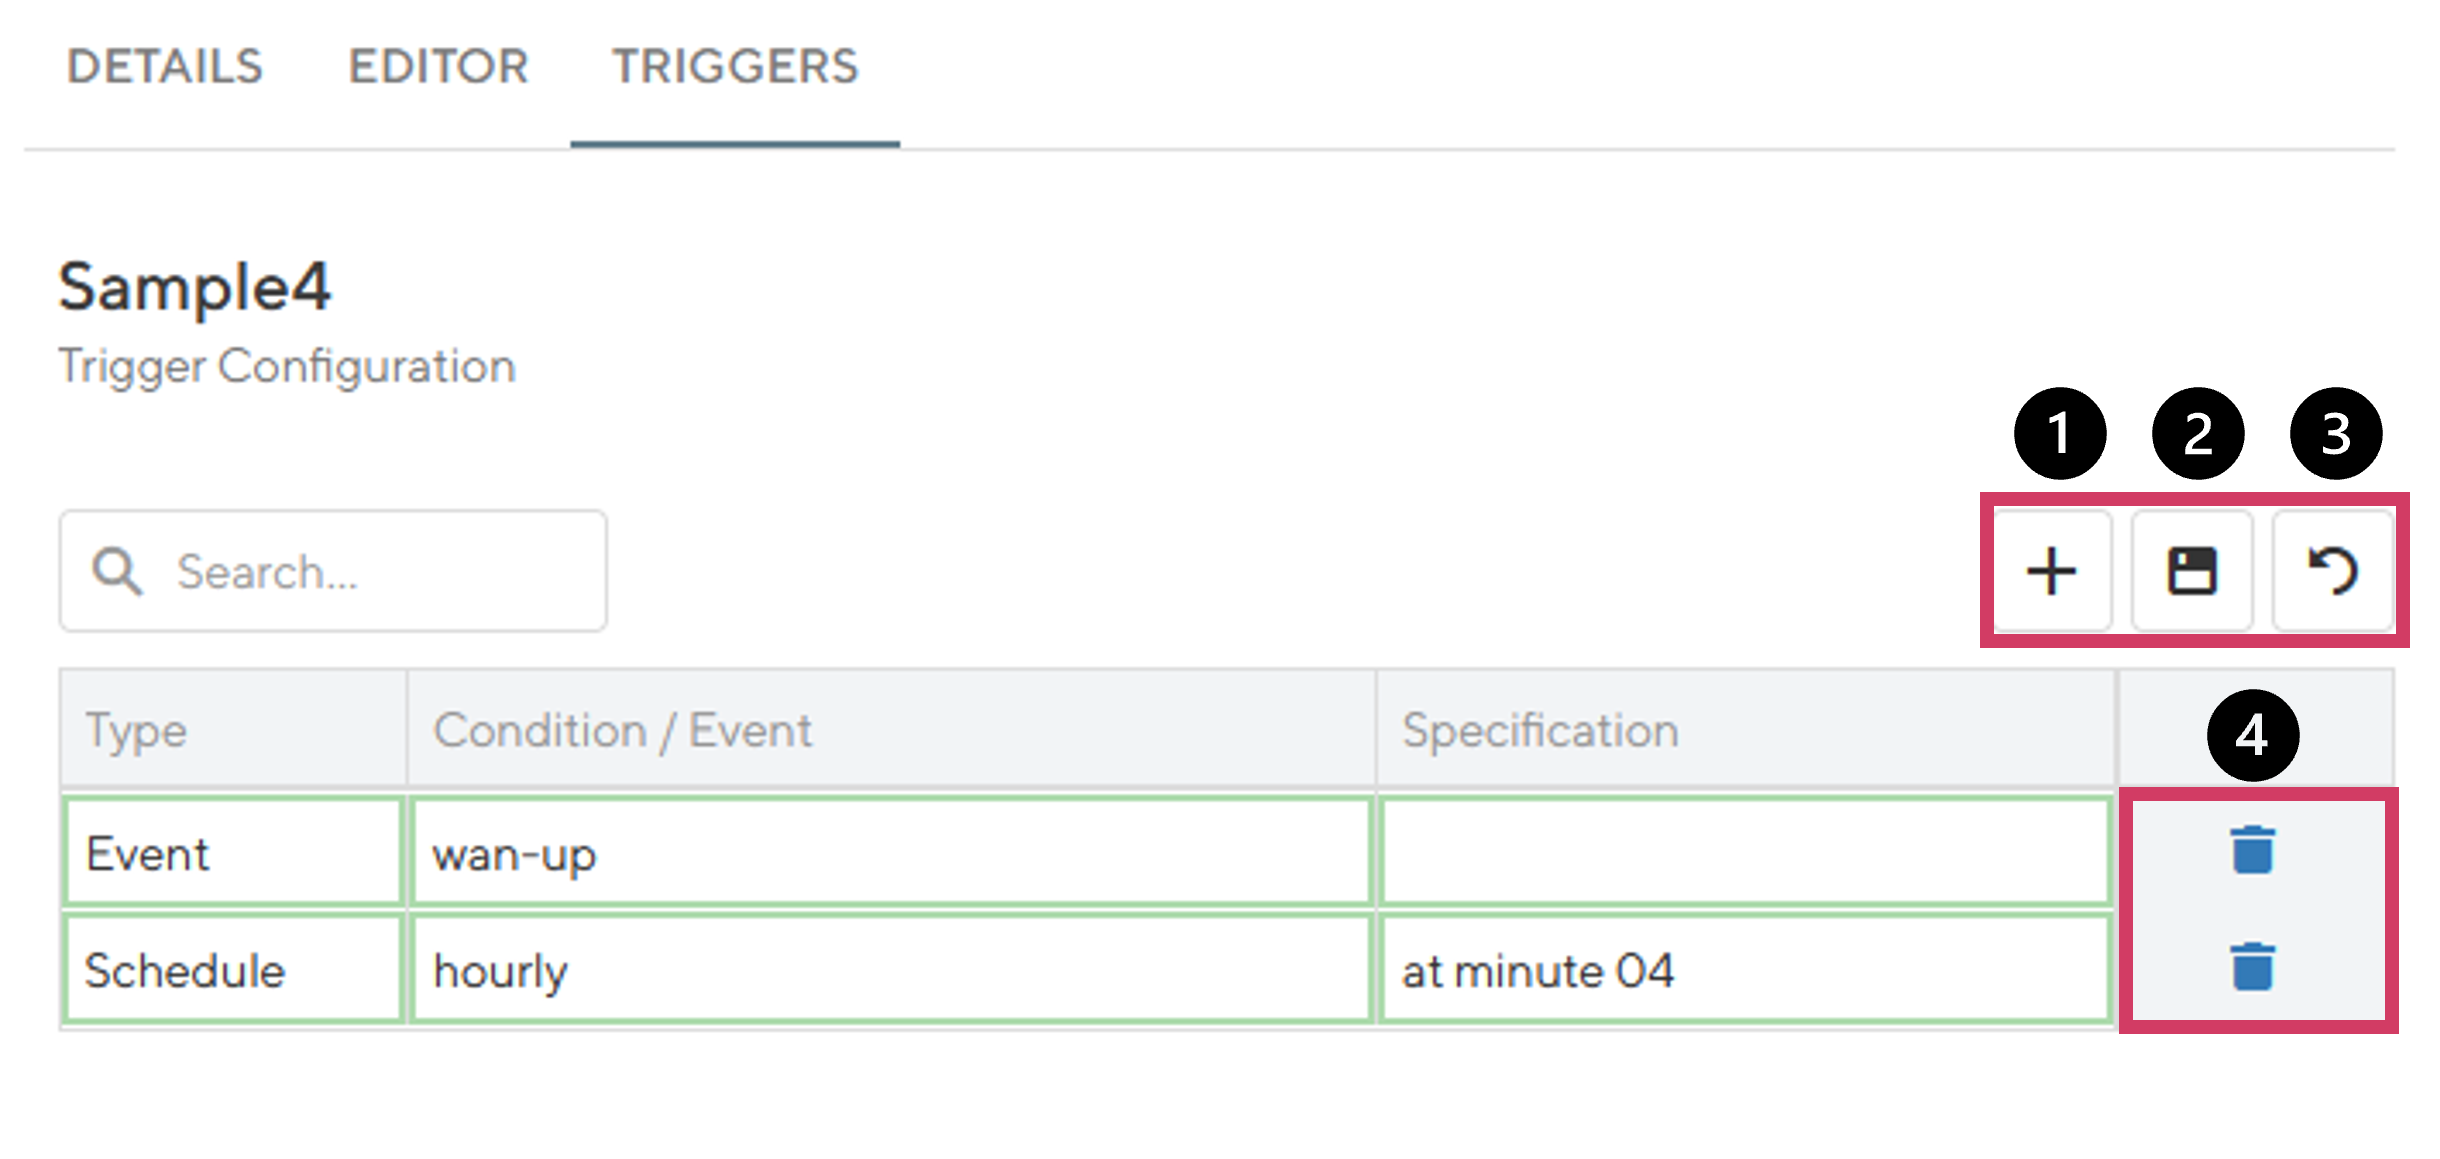
Fig. 9.4 Triggers Configuration
Script Triggers
Type |
Condition /Event |
Specification |
Event |
Select an event from the dropdown menu when the script is triggered |
Stays empty |
Schedule |
From the dropdown, select the frequency when the script is triggered. E.g. hourly |
Enter the corresponding value. E.g. 4, means at 4 mins past the full hour |
9.4.4. Deployment of Scripts
Deploy Scripts
Navigate to “Devices”.
Select the devices for which a script is to be deployed
Under “Actions”, select “Deploy Script”.
Select the script to be deployed
Review the content of the Script.
Choose immediate or scheduled deployment.
Review and Start or Schedule deployment.
9.5. Software/Firmware
To get the latest software for your router go to http://netmodule.com/support/downloads.html
To get the latest firmware for your switch contact Tronteq
9.5.1. Add Software / Firmware
To execute a NRSW Router Software, or a Module-Firmware update, the Soft-/Firmware image needs to be loaded into Connectivity Suite first, before executing the update. Doing so, the following steps are to be taken:
Under Artifacts, Actions, select the item “Add Software”.
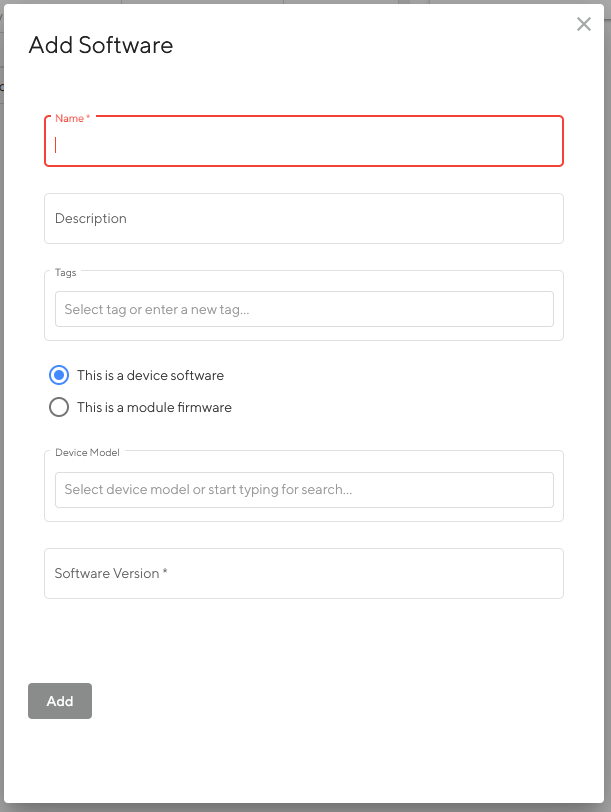
Fig. 9.5 Add Software
Fill out the required fields
Select if this is a Software for the Router or a Module Firmware and click “Add”
A confirmation message will pop up. The added Soft-/Firmware will be listed in the software table of the main dialogue box.

Fig. 9.6 Software overview
Note
It can take a while until the firmware has been uploaded.
9.5.2. Deploying Software
See Section 6.4.3 on how to deploy Software / Firmware
9.5.3. Update Notifications for Devices
Adding a new Software or Firmware will trigger notifications if there are devices on your platform having an older version installed and supporting the added Software or Firmware.
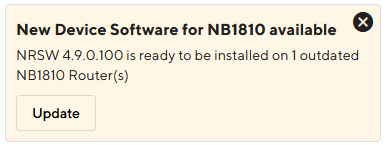
Fig. 9.7 Software Update Notification
These messages provide you with an action link to directly launch the Deploy Software dialog.
9.6. Provisioning Configurations
9.6.1. Supported NM router firmware releases
Before connecting a router to the Connectivity Suite ensure that a supported firmware is running on the device. The Connectivity Suite guarantees support for all supported NM router firmware releases. These can be checked at the following link: https://wiki.netmodule.com/documentation/releases?s[]=nrsw
This chapter describes how to create the configuration required by the NM router to connect to the Connectivity Suite for the first time.
Steps to be executed on the web interface of the router:
Only required if the router is in factory state: Go to the Web Manager of your NM router and set an administrator password.
Only required if the router is in factory state: Set the NM router to WAN mode and change the firewall settings accordingly.
- Configure the router accordingly so that it can establish a connection to the Connectivity Suite Server.
3.1. Open TCP port 22, for SSH access through VPN tunnel from CS 3.2. SSH Server listening on port 22 3.3. root user with SSH access
Download the current configuration (Provisioning Configuration) from the NM router via the web interface.
Steps to be executed on the web interface of the Connectivity Suite:
For the initial NM router provisioning navigate to the page “Provisioning” on the Dashboard. Click on “Actions” at the upper right corner of the Main dialogue box and Click “Create Provisioning Configuration”.
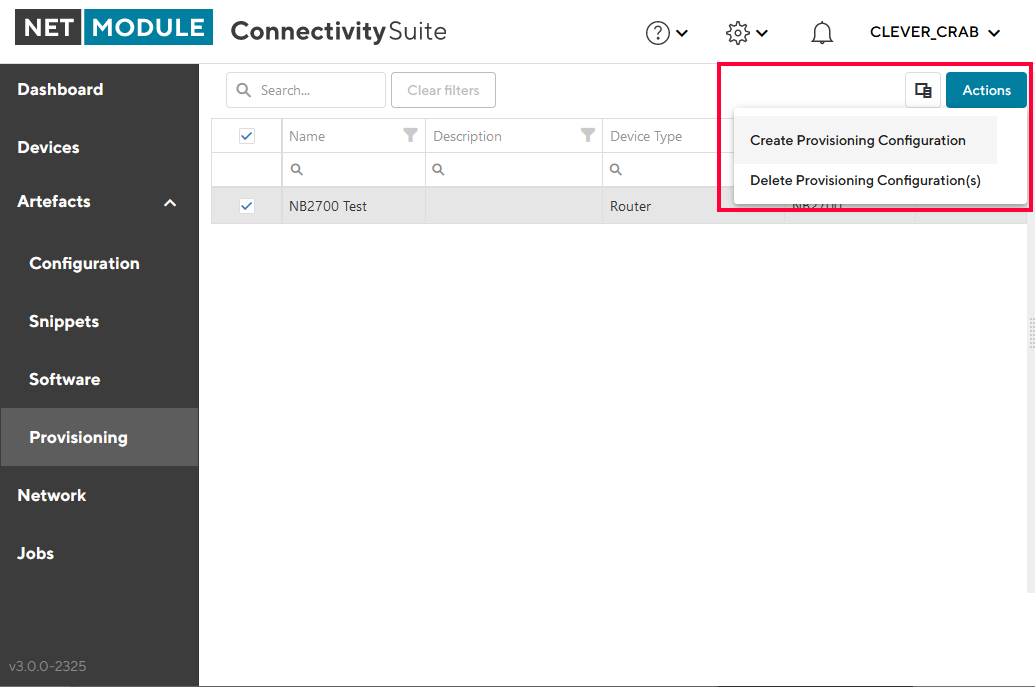
Fig. 9.8 Create Provisioning Configuration
Fill out the required fields and Import the configuration file that has been downloaded from the NM router by click on “Browse…”.
Click “Generate Provisioning Configuration” to upload the configuration to the Connectivity Suite. The uploaded configuration will be shown in the Main dialogue box in the table:

Fig. 9.9 Provisioning overview
Note
The same provisioning configuration can be used for several Devices as long as they belong to the same Device Model