5. Device Management
5.1. Dashboard
The Dashboard provides full summarized overview of the status of the network infrastructure. In the field Devices all Devices are shown which are online, offline or in provisioning state. The Jobs field provides the status about the Jobs to be executed (see Section 5.4.1). The Network Servers field shows how many networks (Tenants) are setup and online.
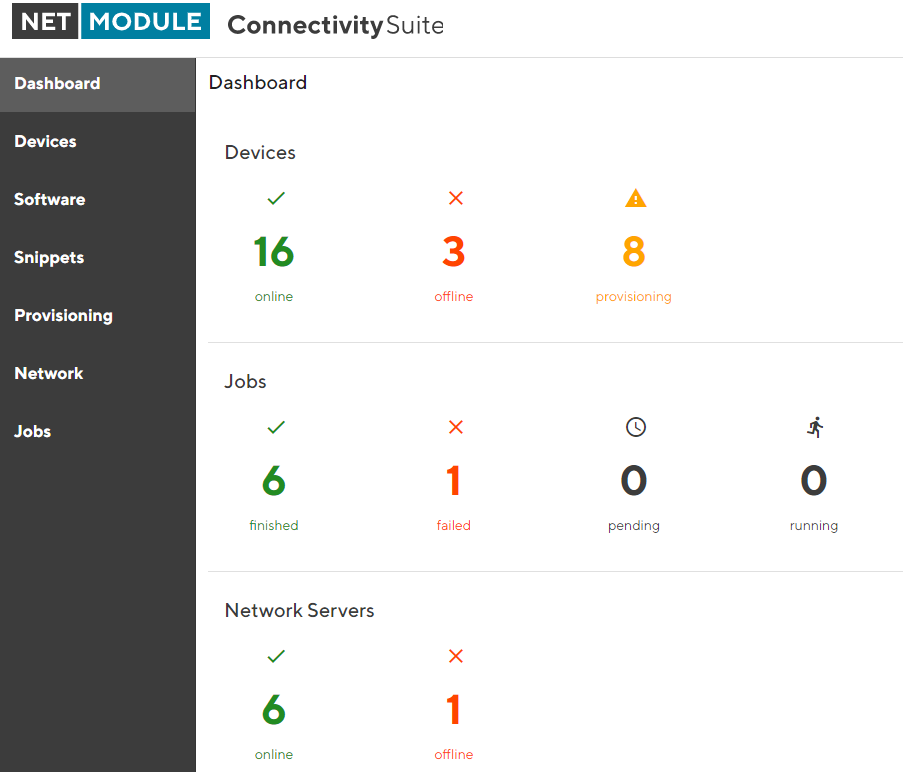
Fig. 5.1 Dashboard
5.2. NM router configuration update
The CS can roll out configuration updates to Devices. The main feature here is mass configurations that can be rolled out for different types of Devices. In addition, configurations of individual devices can also be copied or adapted via the CS.
Note
For the following steps an account with Platform or Tenant Administrator rights is required. A Platform Administrator can execute Configuration updates cross-Tenant whereas a Tenant Administrator can only update Devices of his Tenants.
5.2.1. Mass configuration updates
To execute mass configurations, the Connectivity Suite uses so-called snippets. A snippet is an excerpt from the configuration parameters that configures a specific function of the router, e.g. activating the USB port or switching off WLAN. Snippets can be used to configure an infinite number of Devices, regardless of the Device type (only applies to NM devices).
All configuration parameters which can be used for a Snippet are documented and can be found in the NM Wiki using following link: https://wiki.netmodule.com/documentation/config-parameters?s[]=parameter
Example of a complete Snippet that originates from a configuration with version 1.8 and enables the USB port 0:
config.version=1.8
usb.status=1
usb.0.enabled=1
Before the configuration can be deployed for a massconfiguration a Snippet must be created:
Navigate to the page “Snippets” and click on “Actions” and “Add Snippet” to add a snippet.
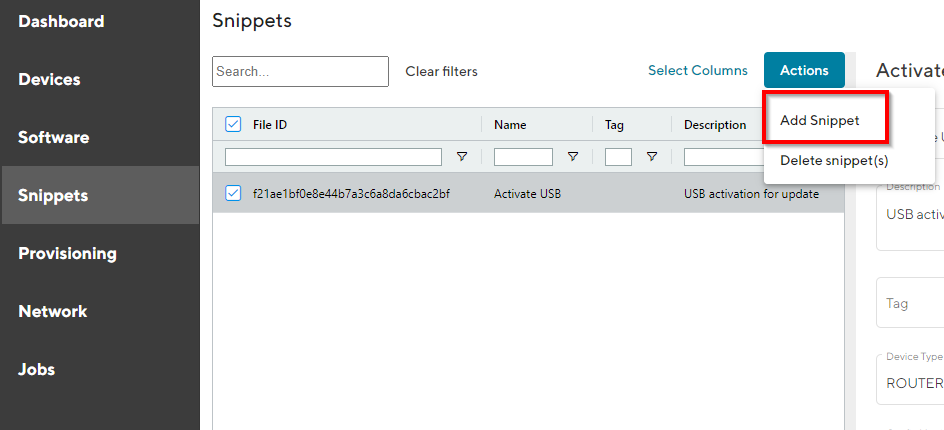
Fig. 5.2 Add Snippet
Fill out the required fields and click “Add Snippet” to save the Snippet.
When creating the Snippet following parameters can be set:
Name |
Name of the Snippet |
Description |
Description of the Snippet to be executed |
Tag |
Tag to identify the Snippet |
Device Typ |
Device type can be a NM switch or router |
Config Version |
Describes the version of the configuration parameters used in the Connectivity Suite. The configuration version is forwarded to the routers. Routers that use an older or newer version can now adjust the configuration parameters accordingly. You will find the configuration version in the first line of a every router configuration (see Fig. 5.3). |
Content |
Subset of configuration parameters taken from a user-config.cfg file can be filled in this field |
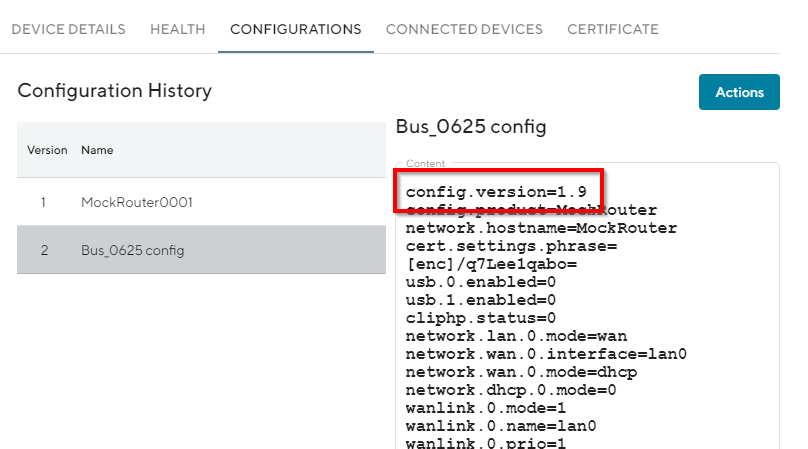
Fig. 5.3 Configuration version
A confirmation message will pop up. The added Snippet will be listed in the Main dialogue box in the table.
Once the Snippet is available in the Connectivity Suite you can update one or several Devices with the same Snippet. Navigate to the page “Snippets” and select the Devices in the main dialogue Box that are to be configured.
Click on “Actions” at the upper right corner of the Main dialogue box and click “Deploy Snippet”.
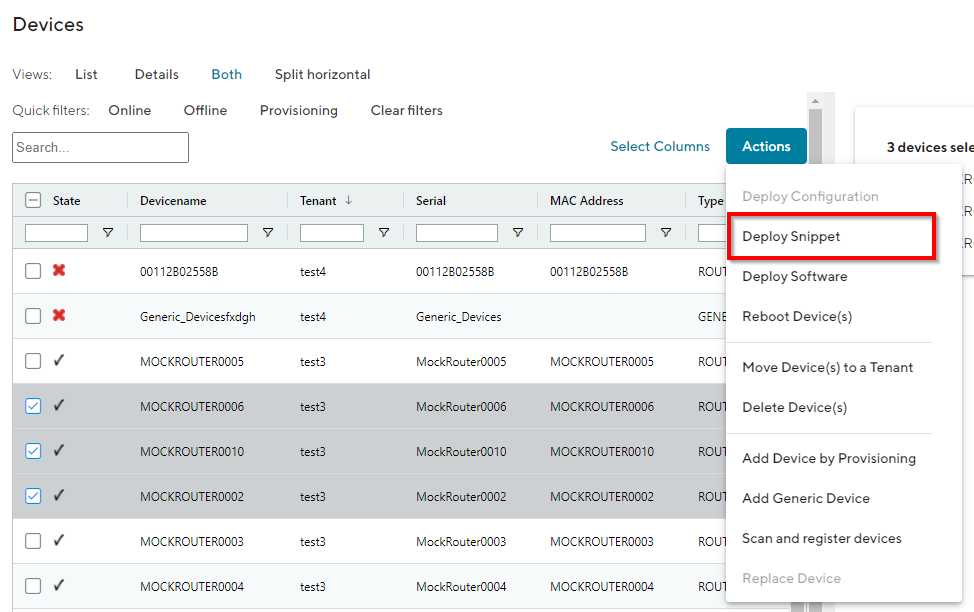
Fig. 5.4 Configuration update
Select the Snippet to be deployed.
Select whether you want to start the configuration immediately or whether it should be scheduled.
Confirm the deployment by click “Start deployment”.
When a Snippet deployment has started it will be listed as a Job in the Jobs table (see Section 5.4). Jobs can be scheduled while creating them (see step 7). Therefore following scheduling options are possible:
Start Date |
The first day on which the Connectivity Suite is going to try to execute the Job, if all conditions are met (time window, day of the week etc.). |
End Date |
The last day on which the Connectivity Suite is going to try to execute the Job, if all conditions are met (time window, day of the week etc.). |
Days |
Offers the possibility to constrain the execution of the Job to specific days of the week. By default, the execution is allowed for all days of the week (the blue color indicates a selected day) |
Start Time |
Offers the possibility to constrain the Job execution to a certain time frame within a day. Only the hour can be specified, higher precision is not supported currently. Allowed values are 0-23, the default value is 0 (midnight). |
End Time |
Offers the possibility to constrain the Job execution to a certain time frame within a day. Only the hour can be specified, higher precision is not supported currently. Allowed values are 1-24, the default value is 24 (midnight). |
Warning
Configuration changes made in the web interface of the Device will not be automatically added to the Connectivity Suite and can lead to connectivity issues. Any configuration changes made in the web interface of a NM router must be uploaded to the Connectivity Suite as described in Section 5.2.4.
5.2.2. Copy Device configurations
Using the Connectivity Suite, configurations can be copied from one Device to another Device of the same type. To copy configurations across devices, follow the instructions below:
Navigate to the page “Devices” of the Connectivity Suite and select the Device in the table of the Main dialogue box from which the configuration is to be copied.
Click on “Actions” at the upper right corner of the Main dialogue box and click “Download this configuration” (configuration can be uploaded via the web manager) or “Download this Configuration as USB version” Configuration can be uploaded via an usb stick).
Select the Device in the table of the Main dialogue box to which the downloaded configuration is to be copied.
Click on “Actions” at the upper right corner of the Main dialogue box and click “Upload configuration”.
Select the downloaded configuration from step 2 and click “Uploade Device Configuration”
Click on “Actions” at the upper right corner of the Main dialogue box and click “Deploy Configuration”.
Select the configuration version to be deployed from step 5.
Select whether you want to start the configuration immediately or whether it should be scheduled.
Confirm the deployment by click “Start deployment”. The job can be started (b) immediately or (a) scheduled.
5.2.3. Restore configuration
Each time a standard configuration is changed, a new configuration version is created rather than overwriting the current configuration. This way, a history of all previous configurations for each Device is recorded. Therefore, The Connectivity Suite can reset a NM router to a previous state by deploying a specific configuration version to it. The different configuration versions can be seen on the page “Devices” in the Detail dialogue box in the tab “Configurations”.
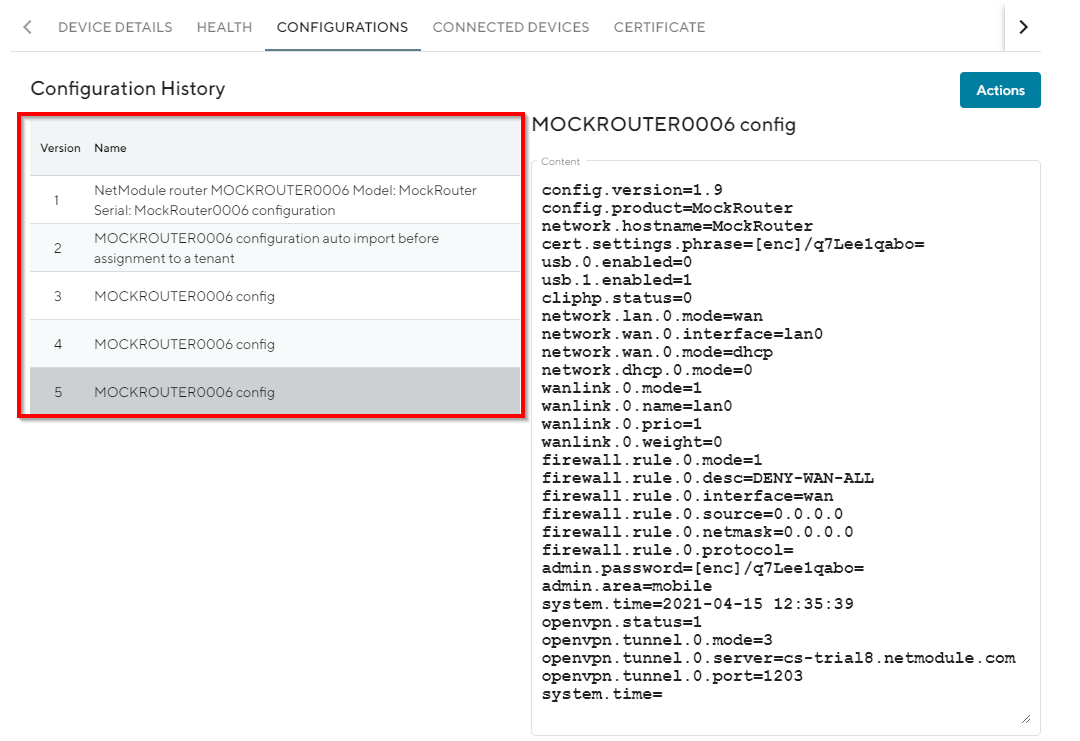
Fig. 5.5 Configuration versioning
The Connectivity Suite creates a configuration version when following happens:
If a Device connects for the first time with the Connectivity suite
If the Connectivity Suite has executed a configuration update
When a Device is moved to a tenant
Before the Connectivity Suite performs a configuration update (backup copy)
If you want to restore an old configuration follow the following steps:
Navigate to the page “Devices” of the Connectivity Suite and Select the Device on which an old configuration is to be restored.
Click on “Actions” at the upper right corner of the Main dialogue box and click “Deploy Configuration”.
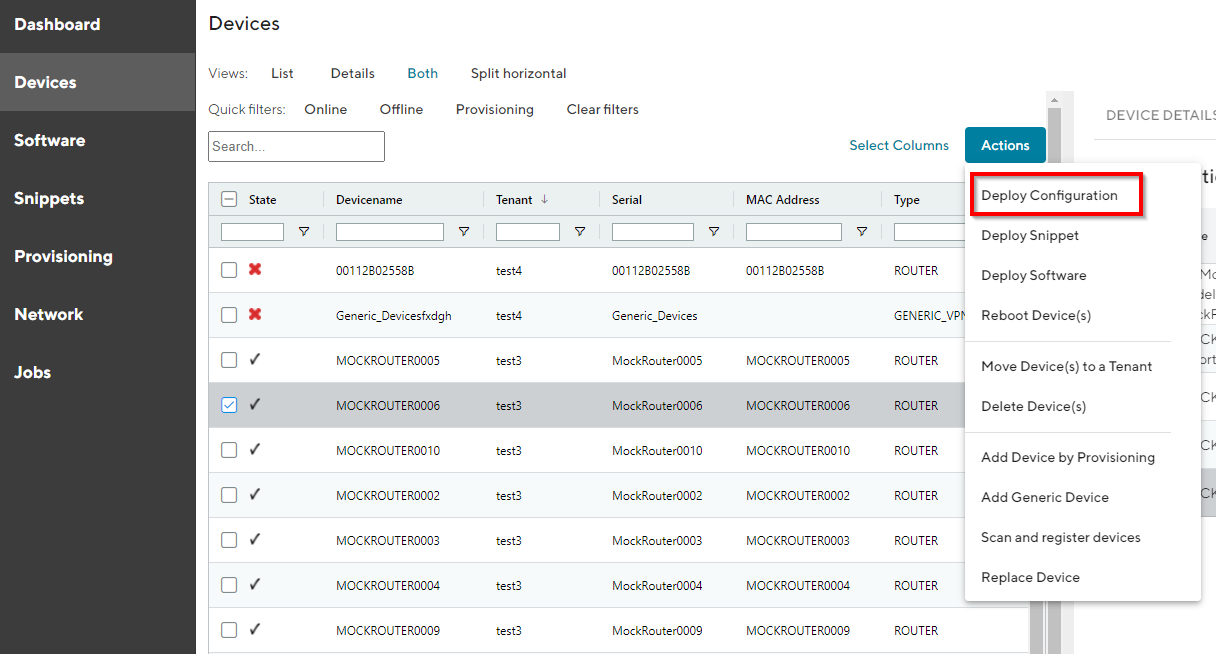
Fig. 5.6 Configuration restore
A list of all configuration versions of the Device is displayed. Select the configuration version to be restored.
Select whether you want to start the configuration immediately or whether it should be scheduled.
Confirm the deployment by click “Start deployment”.
5.2.4. Manual configuration updates
There are a few cases where the Connectivity Suite does not become aware of a Device configuration change, hence the current Configuration stored in the Connectivity Suite does not correspond to the one running on the Device and must be manually updated:
if the change was made outside of the Connectivity Suite (e.g. via the web interface of a NM router or the router CLI)
if an older configuration version has been deployed
In those cases, the user must manually trigger the import of the updated configuration to the Connectivity Suite.
Navigate to the page “Devices” and select in the Main dialogue the Device for which the configuration has changed
Open the tab “Configurations”, click on “Actions” at the upper right corner of the Detail dialogue box and click “Retrieve current configuraton from device”.
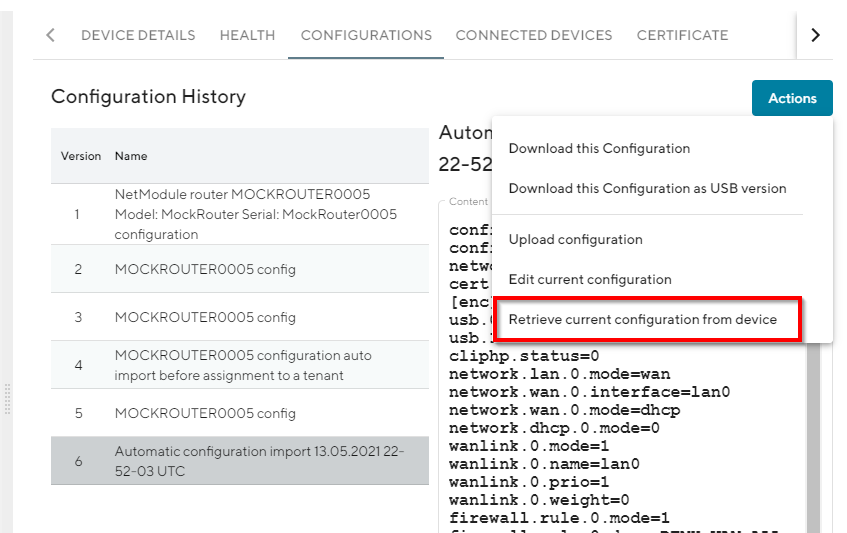
Fig. 5.7 Retrieve user configuration
Choose “Import current device configuration into Connectivity Suite” in the pop-up window. The configuration is now listed in the configuration history table.
5.3. Router software update
Whenever a software update for one or more Devices is required it can be executed via the Connectivity Suite. To get the latest software for your router go to http://netmodule.com/support/downloads.html and download it from the webpage.
Note
For the following steps an account with Platform or Tenant Administrator rights is required. A Platform Administrator can execute software updates cross-Tenant whereas a Tenant Administrator can only update Devices of his Tenant.
5.3.1. Upload Software to the Connectivity Suite
To execute a Software update, it is required to upload the Software first to the Connectivity Suite before executing the update. To add Software to the Connectivity Suite, follows the instructions below:
Navigate to the page “Software” and click on “Actions” and “Add Software” to add a Software.
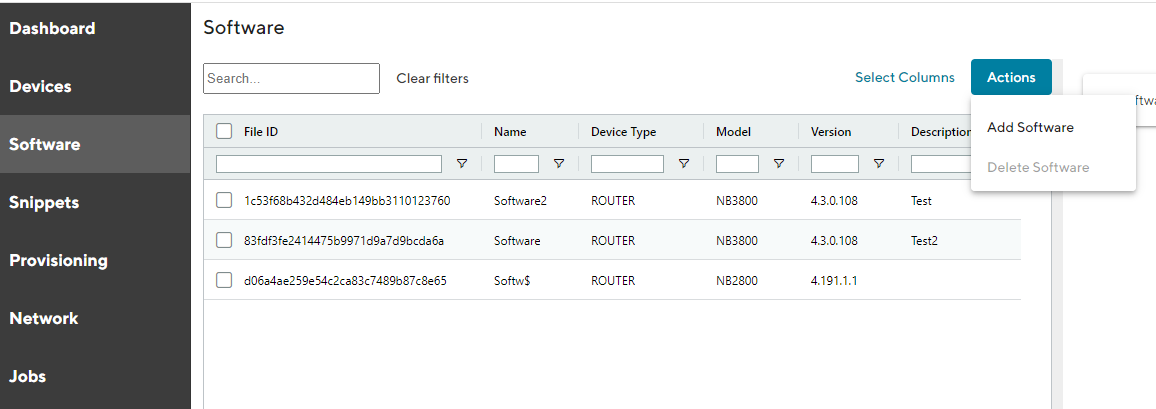
Fig. 5.8 Add software
Fill out the required fields and click “Add Software” to save the Software.
A confirmation message will pop up. The added Snippet will be listed in the Main dialogue box in the table.
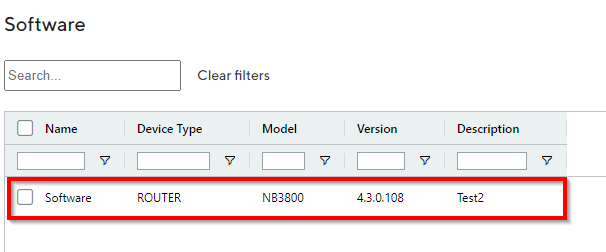
Fig. 5.9 Upload software
Note
It can take several seconds until the software has been uploaded.
5.3.2. Upload Software to the NM router
Once the Software is available in the Connectivity Suite you can update one or several Devices with the same Software image. The Job scheduling system allows you to schedule when a Software update is deployed.
Navigate to the page “Devices” and click on “Actions” and “Deploy Software” to upload a Software.
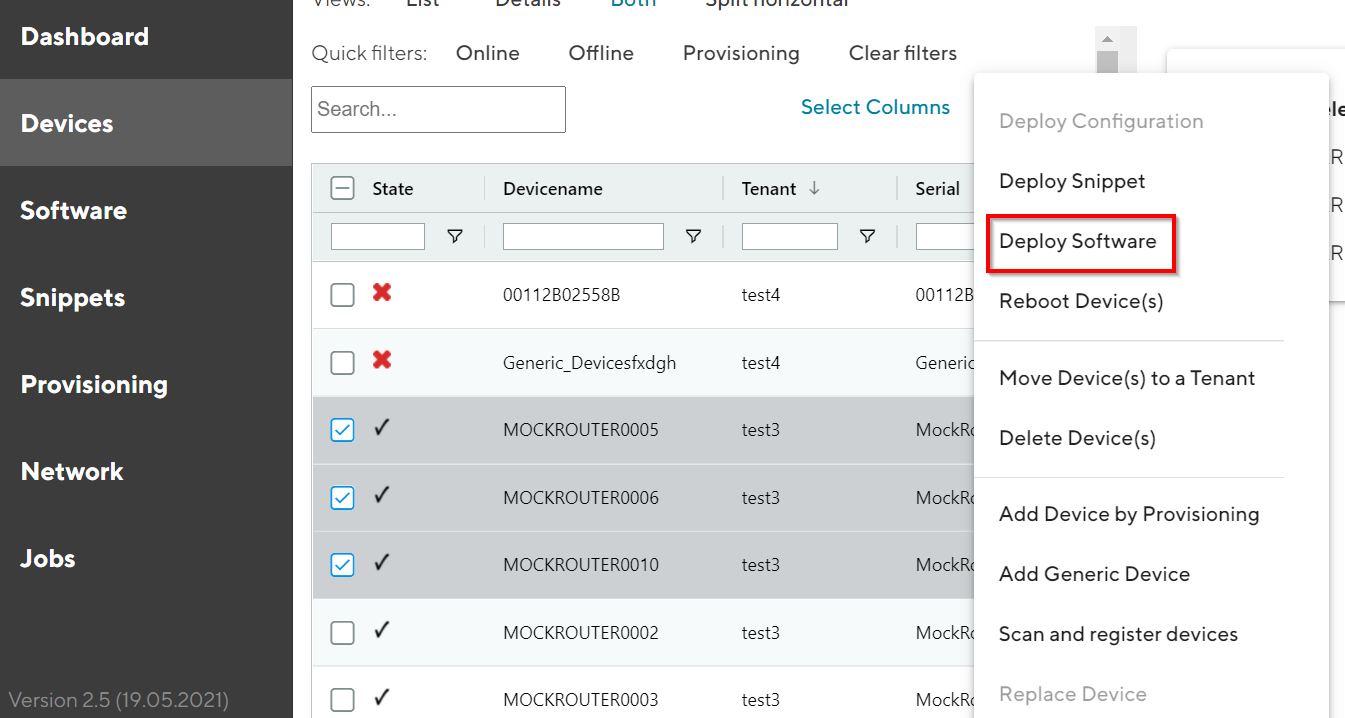
Fig. 5.10 Update Device software
Select the Software to be deployed.
Select whether you want to start the update immediately or whether it should be scheduled.
Confirm the deployment by click “Start deployment”.
When a Software deployment has started it will be listed as a Job in the Jobs table (see Section 5.4). Jobs can be scheduled while creating them (see step 3). Therefore following scheduling options are possible:
Start Date |
The first day on which the Connectivity Suite is going to try to execute the Job, if all conditions are met (time window, day of the week etc.). |
End Date |
The last day on which the Connectivity Suite is going to try to execute the Job, if all conditions are met (time window, day of the week etc.). |
Days |
Offers the possibility to constrain the execution of the Job to specific days of the week. By default, the execution is allowed for all days of the week (the blue color indicates a selected day) |
Start Time |
Offers the possibility to constrain the Job execution to a certain time frame within a day. Only the hour can be specified, higher precision is not supported currently. Allowed values are 0-23, the default value is 0 (midnight). |
End Time |
Offers the possibility to constrain the Job execution to a certain time frame within a day. Only the hour can be specified, higher precision is not supported currently. Allowed values are 1-24, the default value is 24 (midnight). |
5.4. Jobs overview
All scheduled Jobs will be listed in an overview table on the page “Jobs”. This helps to manage the pending updates and provides an overview for the Jobs which were executed or not executed. In the Main dialogue box all Jobs are listed (incl. the status). By selecting a Job in the Main dialogue box, the Job details are displayed in the Detail dialogue box (see Fig. 5.11).
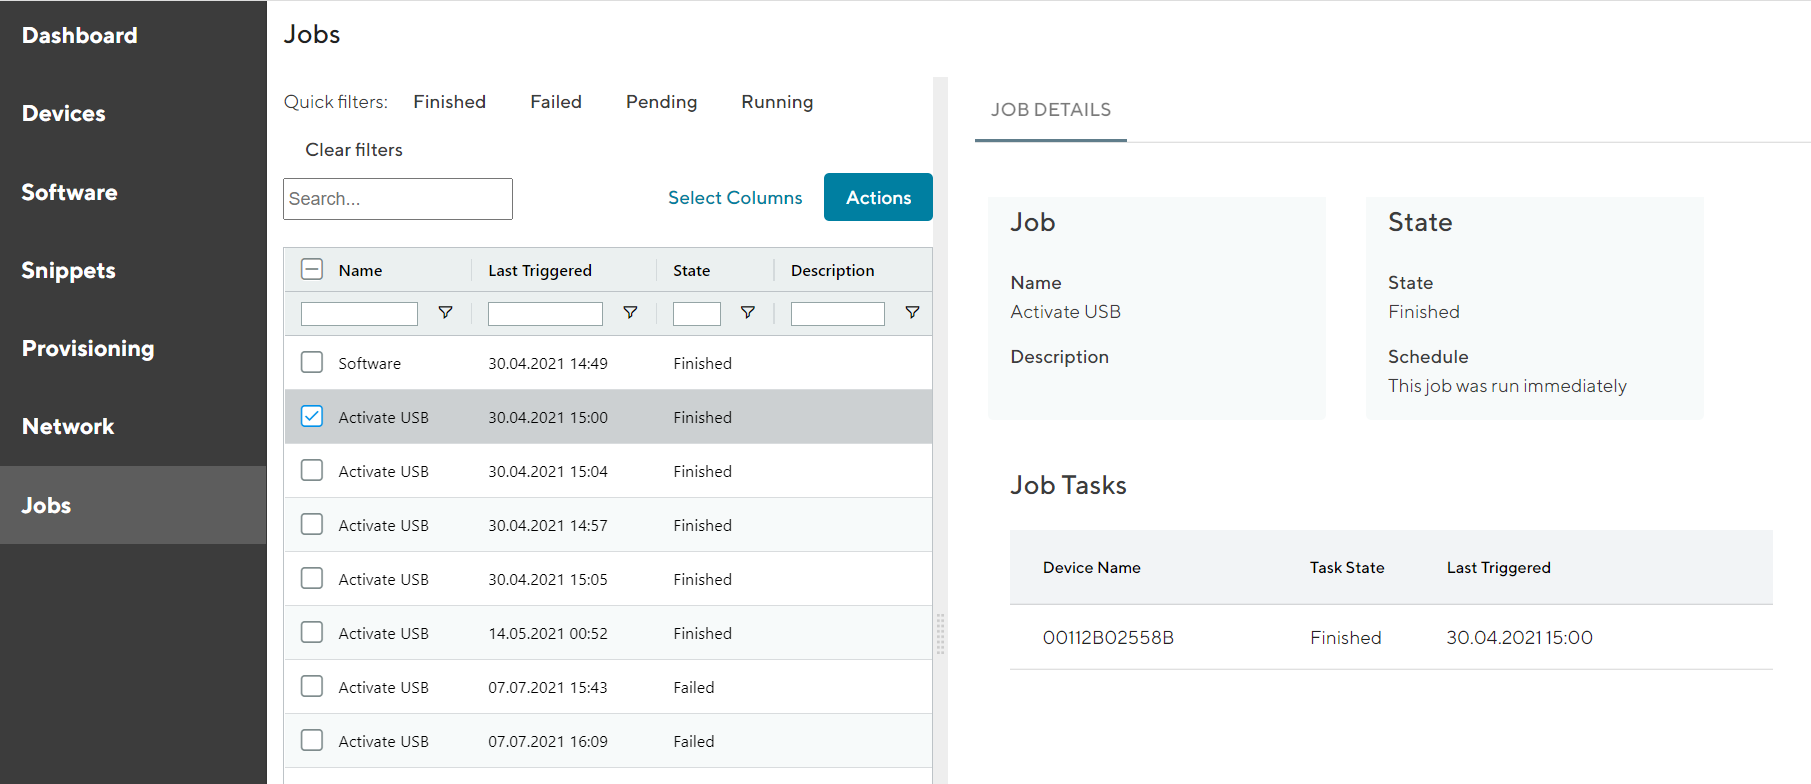
Fig. 5.11 Jobs overview
In the Detail dialogue box the Job Details are displayed:
Job |
Shows the name and the description of the Job. Used for identifying a Job. |
State |
Shows the state of a Job. The different states are described in Section 5.4.1. Also shows whether a job was started immediately or scheduled. |
Job Tasks |
Shows which units are affected by the job and the job status for each unit. The different states are described in Section 5.4.1. The timestamp of when the Connectivity Suite last executed the job is also visible. |
5.4.1. Job and Task states
Jobs as well as Tasks can be in one of four different states.
Pending: A Job/Task is currently waiting for the permission to execute. A Job/Task can be in this state because the start date has not been reached yet or the execution time window is currently closed (the current time is not between start and end time and/or the date of the week does not allow the execution).
Running: The deployment Job/Task is currently being executed.
Finished: The deployment Job/Task was successfully executed, this means that the Software/Configuration has been successfully deployed to the Device and the installation has been started. The correct installation of the Job cannot be verified. A Job is only considered finished if all its Tasks have the state finished.
Failed: A Job/Task is considered failed if the last possible deployment attempt, considering all specified constraints, failed. A Job with at least one failed Task is considered failed.
5.5. NM Router exchange
A NM router will be exchanged due to a defect or a hardware update etc. If the replaced Device is not the same type as the replacement Device this procedure might won’t work.
Warning
Ensure that the software used on the replacement Device is the same or newer than the software version of the Device being replaced, otherwise the replacement will not work and both Devices will be lost.
Navigate to the page “Devices” and click on “Actions” and “Replace Device” to exchange a Device.
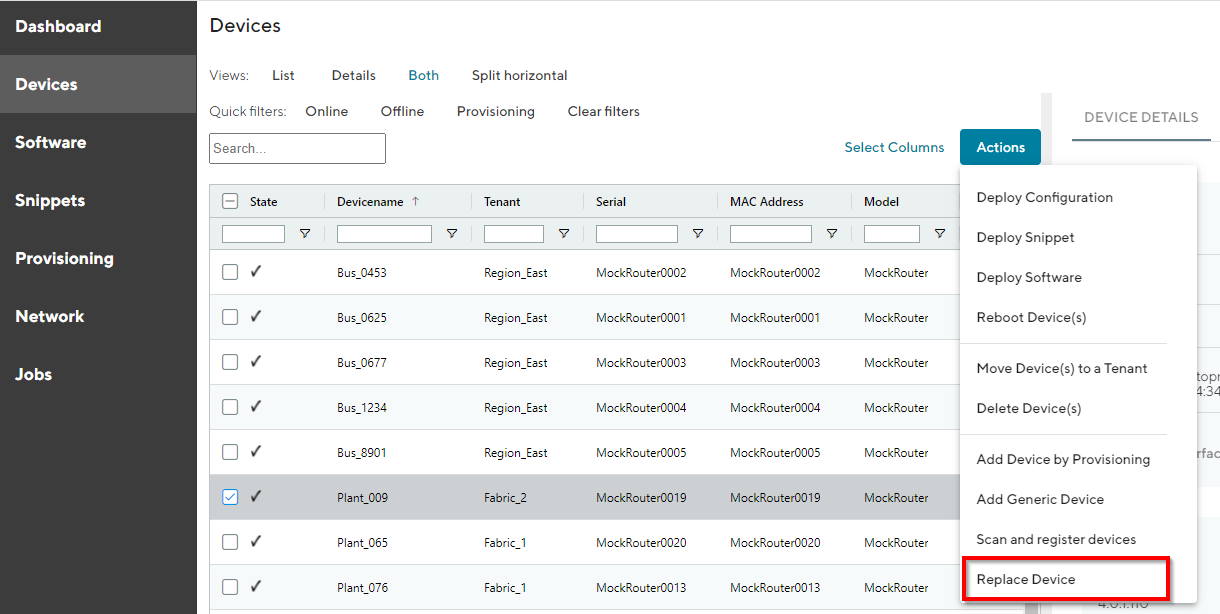
Fig. 5.12 Replace Device
Click “Generate Replacement Device Configuration” to generate a configuration which can be uploaded to the replacement Device.
Click “Download this configuration” (configuration can be uploaded via the web manager) or “Download this Configuration as USB version” Configuration can be uploaded via an usb stick) to download the configuration.
Upload the configuration to the replacement Device via web manager or USB, the replacement Device will automatically connect to the Connectivity Suite and the Device which will be replaced will be automatically removed from the Connectivity Suite.
If the device has connected correctly you can see all the Device details by clicking on the replacement device in the table of the Main dialogue box. The serial number must have changed but the rest of the information should remain the same (except for the software version).
The Connectivity Suite generates a Provisioning Config based on newest stored configuration of the Device which will be replaced and when the replacement Device connects to the Provisioning server of the Connectivity Suite the replacement process will be triggered.
Changes to existing device object:
Software version
Serial number
Note
When the replacement device connects to the Connectivity Suite, the certificate of the defective device will be revoked and it won’t be able to connect to the Connectivity Suite anymore.